Zebra - The Key of Getting the Exposure of an Image
Jun 23, 2021
Getting the exposure of an image right is one of the most important and crucial things on which the final aesthetics of an image is quite heavily depended. Exposure can be tricky unless you’re shooting in perfectly controlled conditions such as a studio where every light can be minutely controlled and there’s time to adjust the set. Outside of that environment, exposure can be a bit hit and miss (imagine if you will, when the sun comes out from behind a cloud – suddenly your perfectly set up shot becomes wildly over-bright). Wouldn’t it be nice if there was a way to check the exposure of the image which is real-time, as unobtrusive as possible, instead pure guessing?
What is zebra
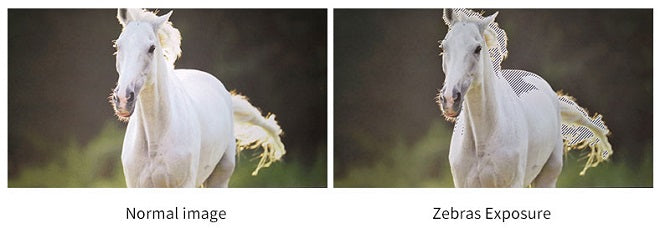
Zebra is an exposure assist tool that is used to identify and highlight areas of the image which are exposed beyond a set threshold limit. Diagonal, slanted stripes of black and white lines are overlayed over the identified parts of the image, highlighting the affected areas. The Zebra Pattern is a highlight warning indicator that is most common in digital video cameras and field monitors; it does NOT control exposure; it only warns you which highlights are problem areas. These stripes will not record onto the resulting image. The slanted striped pattern (hence, Zebra) that you see is set to overlay on areas of the viewfinder/LCD image that are of particular brightness - commonly somewhere between a value of 70 and 80 IRE* of the whitest white that’s possible to record. There are two basic types of zebra display, 100 IRE and another that’s often adjustable, 70-80 IRE.

How to read zebra spattern
The 100% zebra pattern indicates that the recorded pixels are at their maximum value. If you were to turn the camcorder’s exposure up further then because the pixels can’t go any higher than 100% but you’re turning up the brightness, detail in the image will start to be lost. Once recorded like this, it can never be regained. It’s similar to recording sound too loudly; once audio has been captured too as distorted, it can’t be brought back as “undistorted”.
To put it even more simply, imagine counting to 10 on your fingers. Now try to count 11 … or 12 … and you can’t! The maximum is 10. Any detail above 10 simply gets lost forever because it’s recorded as just 10 (we are assuming in this example that you’re not some clever chap who counts in binary on their fingers and can therefore go up to 1023…) Seeing the zebra pattern on your screen if it’s set to 100% is thus a big warning flag that your image is about to be recorded too bright and the exposure should be reduced.

Example of face exposure
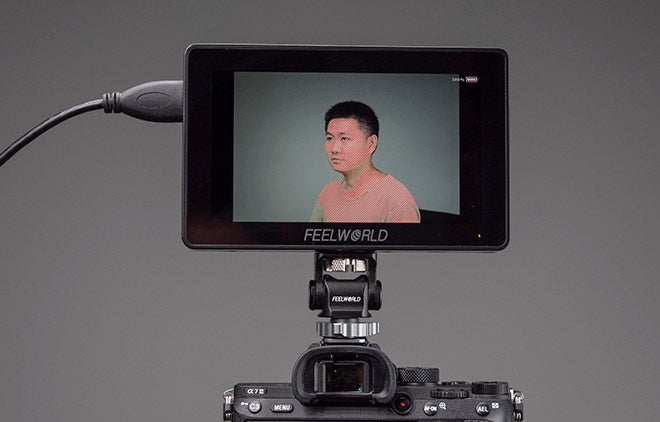
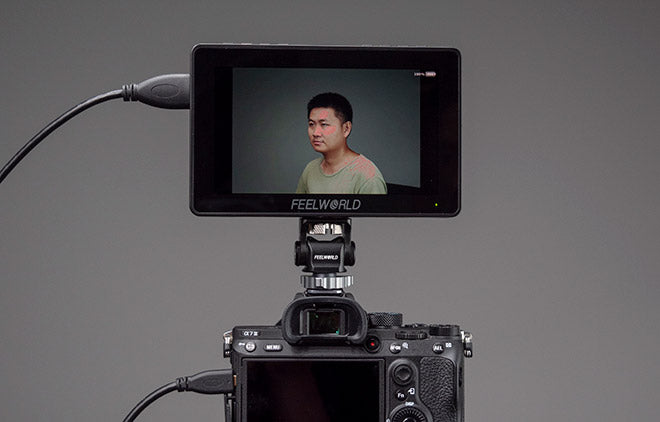
The other major use for zebras is to set the correct exposure for faces, for example when filming an interview or filming a presenter piece to camera (aka “stand up”) There is a general rule of thumb that white caucasian faces reflect about 70% of any light that falls on them. In exposure terms, that corresponds with 70% brightness of the pixels. So the idea of using zebras set to 70% is to change the camcorder’s exposure settings (f-stop and gain) until the face just starts to show the zebra pattern in the viewfinder and that way you know you’ve got the exposure set correctly. Don’t overdo it – you don’t want the whole face necessarily being zebra’d out. Just a hint of the pattern on the brightest spots (usually the nose & forehead) should do it.

The whole 70% thing is merely a rough guide because the range of human skin tones means it’s only ever approximate.
This becomes more pronounced with non-white faces because the range of tones means there’s no simple ballpark exposure figure to work on. You have to simply go more by eye, or start by exposing to 70% (which will be vastly overexposed for a dark skin) and then dial the exposure down.
Note
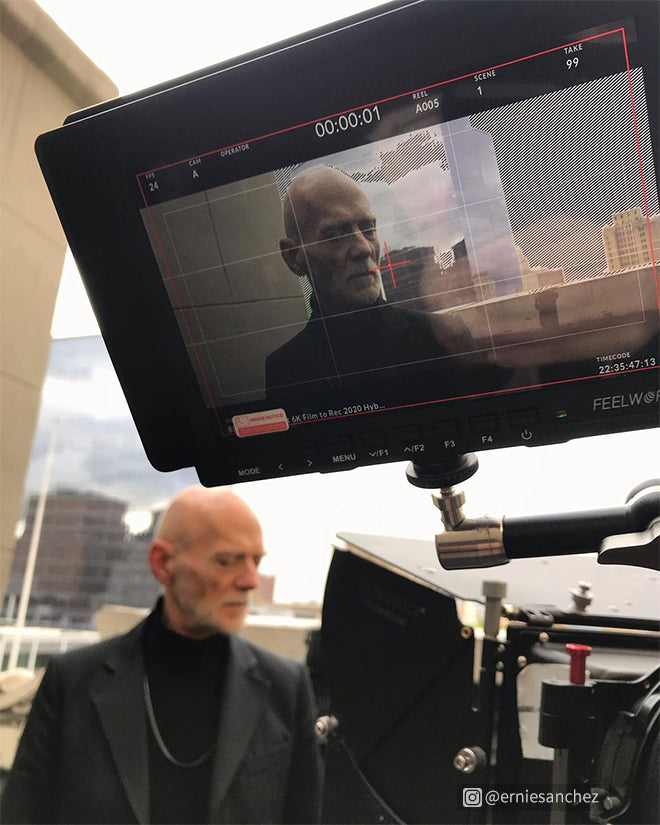
Be careful when relying on zebras to set exposure though. In almost every case, parts of the face you’re filming will be darker than other areas. Imagine, if you will, a bald man in bright sunshine. The top of his head will be bouncing a lot more light off it than the area under his eye sockets which could well be in shadow. It’s also best to start off to dark and bring the exposure UP rather than start bright and bring it down as this means you’ll err on the side of underexposed. In that case you can brighten the image up without losing detail during your edit. If, however, you start bright and bring it down, you may still overexpose some parts which as explained above, can never be recovered. In all cases though, the zebra pattern is simply a useful tool. It is not an absolutely rigid rule to which you must stick. Like all tools, it’s there to help but must be used together with your eyes and your experience.

FEELWORLD products have zebra function, you can monitor the exposure of the shooting in real time, enhance team cooperation.
False color is also a kind of way to check the exposure when shooting, you can see the detail here if you are interested in.

