
How to Use False Color to Check Exposure in a Field Monitor?
Jun 12, 2021
When shooting a movie, you want to make sure everything looks good, from the focus of the shot, to the lighting of the set. While our naked eye can often do a good job helping us out, exposure tools help us not miss any spots. In-camera tools like zebras and histograms help out cinematographers, but so do false color images. In this article, we will guide you through the basics. So what is false colour? To put it plain and simple, it’s a feature usually found on field monitors which helps you read the exposure value of an image, very similar to Zebras or a histogram.
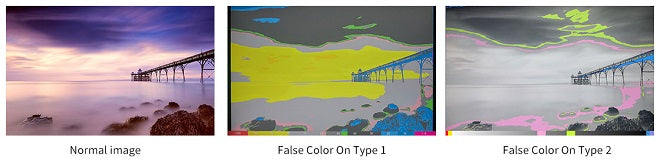
Basic of reading false color
So every pixel on a screen will have an exposure value from 0-100. 0 being black, 100 being white, and everything in between being shades of grey. The field monitor will read the exposure values in every pixel and transform them into distinct bands of colour. So how do you use it? False colour will give you a chart of the colour bands, usually on the side of the monitor, providing you with chunks of different exposure values which are easy to distinguish from each other. So just like how Zebras is commonly used to indicate when you’ve over-exposed to 100, or completely white, false colour gives you a whole range of indicators.
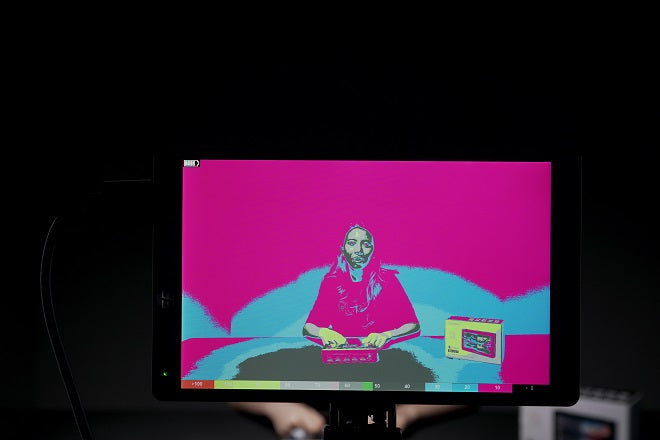
Example when setting the exposure with false color
You can use this information when setting exposure during a shot. For instance! You’ve setup a scene, brought in your talent, and have started setting up lights. The first thing you might want to do is make sure the subject has enough light on their face. It’s common to set the exposure value of people with light skin to 70 IRE. On the false colour feature we can see the 70 range shows as this light grey colour. So we can adjust the light and the settings on the camera until the majority of the subject’s face is in this colour band.
But it doesn’t end there! Once we’ve adjusted and are happy with the exposure on skin, we can now adjust and customise the rest of the lighting in the scene. We might want to make the rim light on the subject a highlighted spot, say around 80 IRE, so we can adjust the brightness of the rim light until it touches on yellow.
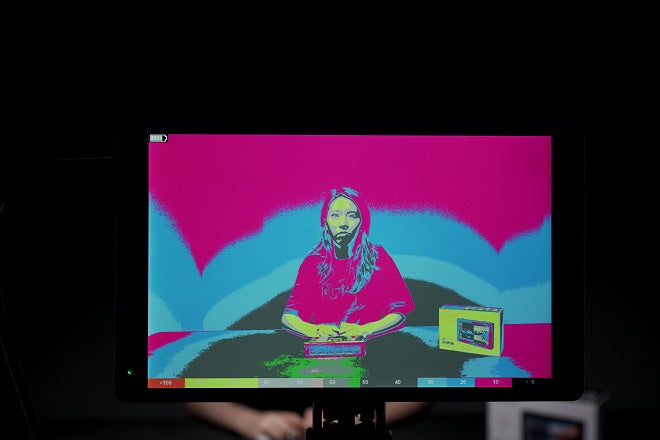
You can also do this with the background. In this case, false colour is telling us that the background is sitting very close to zero, so we’ve actually lost almost all the information in the background. We can fix that by lifting the brightness of the background using a light until it appears in the desired colour band. In this case, we want it to hit the 20-30 range, which is blue to grey.
This technique is great for keeping the lighting in the scene consistent. Once you have one shot setup, you can make a note of the colour band values for each element in the scene; skin tone at 70, highlight at 80, background light at 30, and make sure each shot in the scene uses these values. This also means you can create different looks just by how you exposure the elements in the scene.
Here is a video about how to set and use the false color on the FEELWORLD F6 PLUS camera DSLR field monitor.