How to use your camera to live stream using the HDMI port?
Jun 04, 2021
How To Hook Up Camera To Computer?
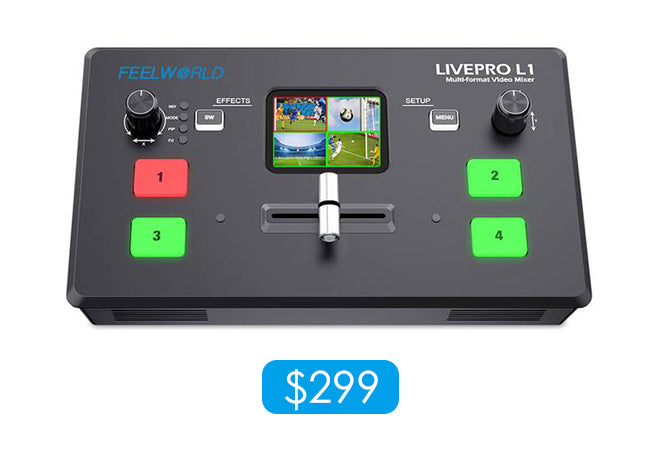
There is the question you will faced with when you are trying to set up your live stream system.Your camera had an HDMI output, but the computer only had USB inputs. So you will need a video switcher or a capture card in order for to recognize the input unless you have an HDMI input on your computer. If you set up a multi-camera, I suggest you have a video switcher, so that it is more convenient to switch pictures and add overlays. If you don't want to spend a lot of time or money trying to figure it out, then you should check out the FEELWORLD LIVEPRO L1 V1.

The USB port on your camera only works after you finish recording, not while you are recording. That is why you should make sure purchased a camera with a clean HDMI output.
Besides, you also need a computer with streaming software installed, and a HDMI and USB cable.
Steps to setup live streaming
Capture card user:
1.Connect one end of the HDMI cable to the camera HDMI output, and the other end of the cable to the HDMI input of the video capture card.
2.Connect the video capture card to the computer using the USB cable.
3.Open the video/audio settings of the streaming software on your computer.
4.The software should recognize the capture device and your camera as a webcam. The live stream from the camera should now be seen on your computer.
Video switcher user(here we take FEELWORLD L1 V1 as an example):
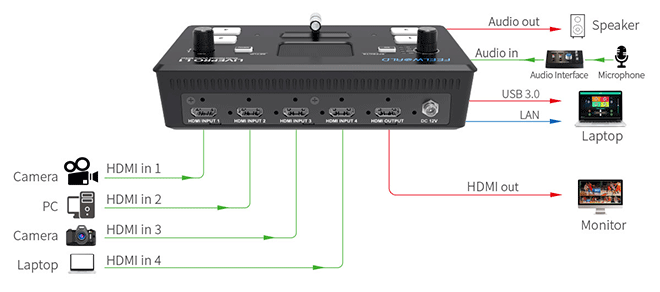
1.Connect one end of the HDMI cable to the camera HDMI output, and the other end of the cable to the HDMI input of the video switcher. L1 supports up to four HDMI signal inputs.
2.Connect the video switcher to the computer using the USB cable.
3.If you use a microphone and a sound card, you can connect the interface of the headset monitor of the sound card to Audio input. If you use a wireless microphone, you can connect the interface of the headset monitor of the microphone to the Audio input.
4.Open the video/audio settings of the streaming software on your computer.
5.Here we choose FEELWORLD USB 3.0 Capture and confirm. The live stream from the camera should now be seen on your computer.

TIPS:
1.To provide better focusing, enable the following on the camera (if available):
- Face-Detection Auto-Focus
- Continuous AF
Notes:
1.High quality, continuous video streaming may cause the temperature inside the camera to rise, which can cause it to turn off automatically until it cools.
- Review the heat specifications, avoid streaming in direct sunlight, and turn the camera off when not in use.
- If your camera can record in XAVC S 4K and it has the Auto Power OFF Temp. setting, changing the setting from Standard to High will provide longer recording time.
2.If you use an external microphone, then be sure to select the proper device in the audio settings of your computer.
3.If the camera menu appears on the stream, then navigate to HDMI Settings → HDMI Info. Display → Off to turn off the display.

