How to Lighting Setups for Live streaming?
Mar 09, 2023
Finding the right live streaming lighting can be a process. Live streams are all about creating engaging content, setting the mood, telling a story, interacting with your audience in real-time, and nurturing your loyal audience base.Get your live streaming lighting setup right, and your live streams will look more professional and visually appealing. It will also help add depth and character to your live streams, light you (the subject) up, and even add layers and dimensions to your live videos that elevate the overall quality.
The lighting in the live room is roughly divided into Key Light、 Fill Light、Hair Light / Separation Light / Kicker、Background light.In this live streaming lighting setups guide, you'll learn how to lighting setups for live streaming.
What is Key Light?
If you could only use one artificial light source, you’re going to want to get a key light. Even with a multi light source set up, this is the “main” one. The key light does most or all of the work for continuous lighting up your subjects face. Any other lights used will compliment the work done by the key light. This light is most often placed to one side of and pointed directly at your subject.
What is Fill Light?
This light is used in conjunction with the key light. The fill light brightens the shadows cast on your subject by the key light. The fill light can be as bright as the key light but generally you want a little bit of shadow on your subject’s face to show some dimension in your shot.
What is Hair Light / Separation Light / Kicker?
These light is has different names depending on if your subject is a human or an object but they provide the same purpose. This light is meant to only fall upon a small part of your subject, the hair for example. The light beam is narrow so as not to hit a large part of your subject. Of course, the closer your hair light is to your subject, the more narrow the highlight. So move your light further away from your subject if you want it to hit a slightly larger area. This light should be set as high as or higher than your key light. This light is meant to help your subject stand out from the background and potentially draw your eye to a certain part of the image.
What is Background Light?
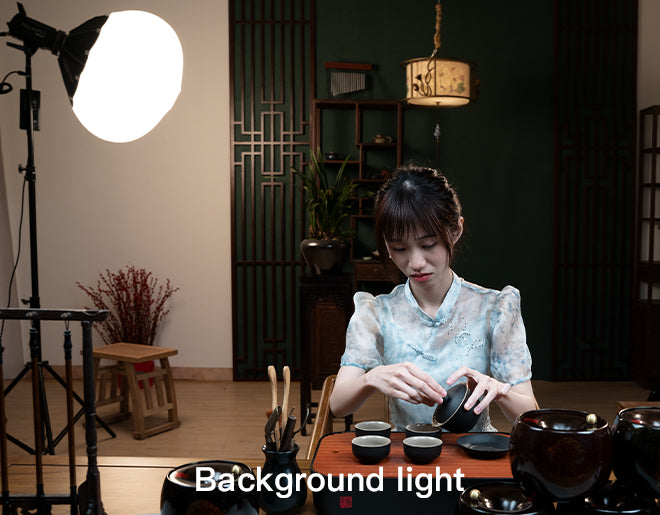
With so many lights on your subjects, sometimes your background can turn out too dark. Here is where the background light comes in handy. Background lights can also help eliminate shadows cast on your backdrop by your subject. This light is most often dimmer than or equal to the power of the key light.
Here is use FEELWORLD four lights and softbox to build:
Key Light:a FEELWORLD FL225B bi-colo light with a FEELWORLD FSP90 Parabolic Softbox
Fill light: a FEELWORLD FL125B bi-colo light with a FEELWORLD FSP90 Parabolic Softbox
Separation Light:a FEELWORLD FL125B bi-colo light
Background Light:a FEELWORLD FL125D daylight light with a FEELWORLD FSL65 Lantern Softbox
Final Effect:
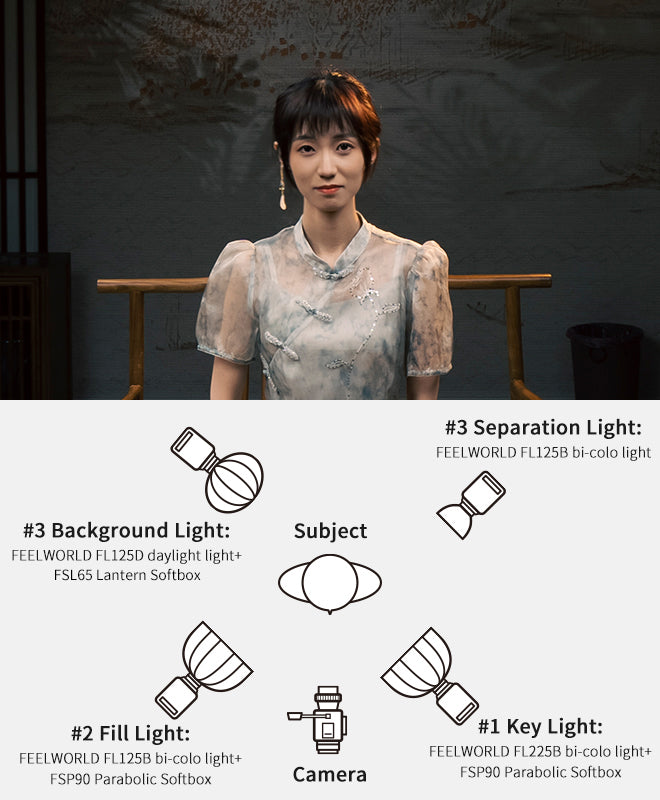
(1)Key light:
Lighting setup is nothing around the four goals of brightening the character, highlighting the subject, brightening the background, creating the atmosphere, before the light setup we need to turn off the indoor lighting, because ordinary lighting will lead to strobe, but also affect the ambient color temperature, especially makeup live, the type of product color is more, will produce many uncontrollable impact factors.
First of all, we have to determine the location of the character, after determining we built a FEELWORLD FL225B key light above the character, this light is a bi-color light, bi-color light is the benefit of creating different scenes, mood, atmosphere, from this direction of light irradiation sufficient uniform, soften the face, play the effect of dermabrasion whitening,with a FEELWORLD FSP90 Parabolic Softbox, the height should be higher than The character is an arm and a half away from the character, it is best to install an grid to control the light to prevent a diffuse scattering of light, so that the light will be able to focus on the finger in the range of the character, so that our characters have a light and dark levels, the character's body will be bright and soft, light and dark transition evenly.
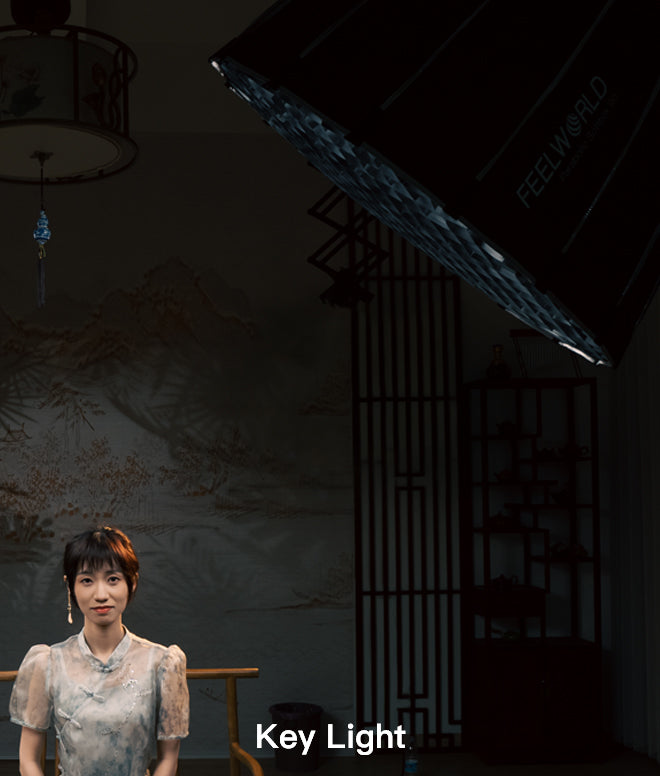
(2)Fill light
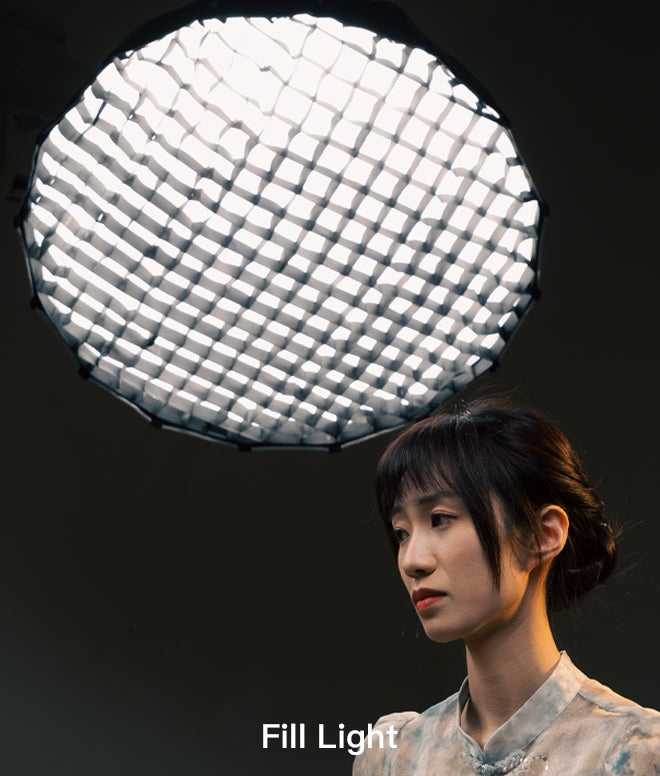
On the other side of the main light, the fill light shining on the left and right side of the figure can make the facial contours create shadows to create a sense of three-dimensionality. But pay attention to the details of the light ratio to avoid light too bright or too dark will make the character lose the sense of three-dimensional and facial exposure.
We built a FEELWORLD FL125B fill light with a FEELWORLD FSP90 Parabolic Softbox, while the height is also higher than the character, so that we can illuminate our side shadow areas to light up the other side of the character, brighten the shadow part, balance the picture light ratio, the brightness of the light must be lower than the key light!
(3)Separation Light
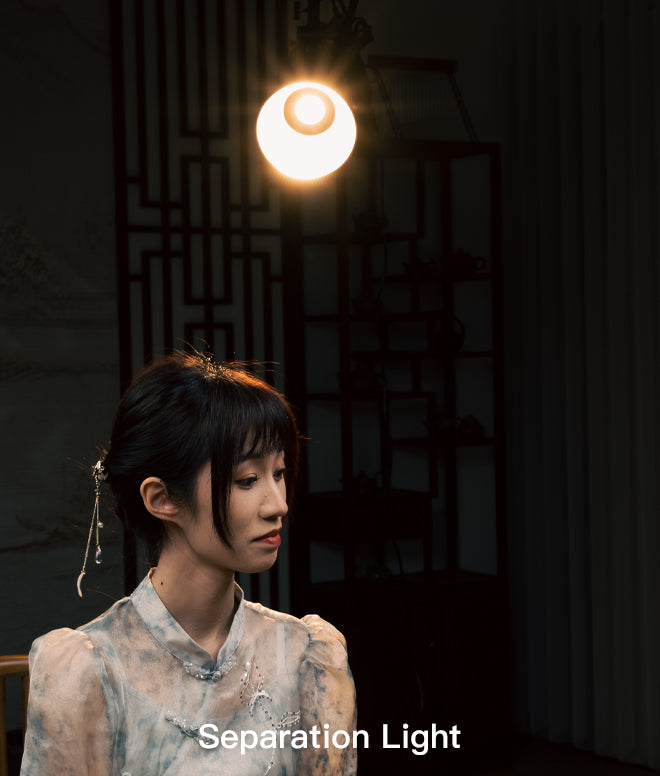
Then we will be a FEELWORLD FL125B with a standard hood of hair light hitting the front or side back of the character, outlining the edges and contours of the hair, separating the character and the background, to play a prominent role in the subject. To pay attention to the contrast of light brightness, if the light is too bright will directly cause the dispersion of the light of the behind the figure. Built light evenly light to enhance the character atmosphere.Background light is the icing on the cake of the character.
(4)Background Light
After creating the contour of the character, the overall atmosphere of the room has been greatly improved. But the background will look dull because no light, the main role of background light is to even out the indoor light, so in the background we can place a FEELWORLD FL125D daylight light with a FEELWORLD FSL65 lantern softbox to add some layers to the background of the picture, increase the three-dimensional effect of the picture, so that the background is softer.
Here are FL125B & FL125B & FL225D & FL125D Comparison:

Here are FSP60 & FSP90 & FSL65 & FSR90 & FSR120 Comparison:


