
How Focus Peaking Can Efficiently Promote Your Shoots?
Jun 12, 2021
Focus peaking is a useful, popular manual focus assistant found in most of today's mirrorless cameras and our FEELWORLD field monitors. Focus peaking, also called "peaking highlights", is an extension of a long line of focus aids going back to prisms found in older film cameras. Focus peaking can really speed up your manual focusing and help you focus more accurately.
What is focus peaking
If the lack of autofocus deterred you from trying a classic lens on a new camera, focus peaking (also called peaking highlights) is the solution. Focus peaking is a real-time focus mode that uses the camera’s Live View focusing aid to highlight peak contrast areas with a false-color overlay in your viewfinder. This can help you determine what part of the image is in focus before you shoot.
Initially used by videographers, focus peaking has taken advantage of modern technological advances to go beyond video cameras to be widely available in most still digital cameras. All newer mirrorless cameras come with this function. If you have a DSLR camera, it may be called Focus Assist for Live View.

How focus peaking works
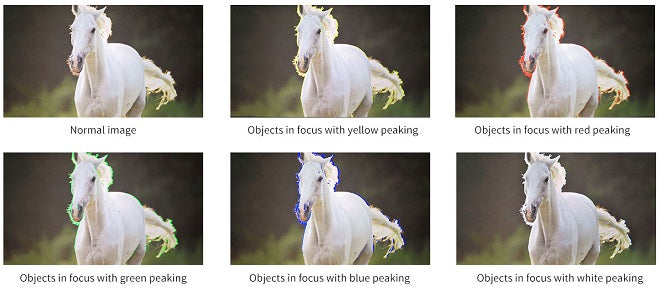
Focus peaking is based on the principle that the sharpest areas of an image have a high contrast, which appears on the Live View display as either a white or colored highlight on the edges and textures of objects. An algorithm analyzes the image in real time, and when an item comes into focus, the sharp edges create an intense exposure in that specific area of the picture. The camera looks for “sharp” edges by analyzing contrast. If there’s a hard edge, which will only happen when something is in focus, there will be high contrast. When the camera sees enough contrast, it will overlay a color on top of the edge. Cameras as well as field monitor typically offer a selection of colors for you, based on what you prefer and see the best based on what you’re photographing. Colors often include red, blue, white, green, and yellow, depending on the camera.
Why is focus peaking useful
Focus peaking allows the photographer to focus manual lenses with greater speed than the typical Live View method. It’s ideal for scenarios where it’s challenging to quickly assess what areas are in focus. This can be useful for shoots with low-light conditions or when it’s difficult to determine a good focus with the naked eye.
If you don’t want to use autofocus to capture slow objects, like clouds moving in the sky, focus peaking is the technique for you. Use it to find the proper depth of field for your shots, but pay attention to your adjustments, including your ISO.
"You can usually set it too high or low," says photographer Jason Weingart. "If you’re shooting at a shallow depth of field, like a 1.4 f-stop, you want to set a higher sensitivity of focus peaking. Not as much stuff is going to be sharp, so it’s going to come through a little better. If you’re shooting a really wide depth of field, you’ll have that set lower because more things are going to be sharp."
Focus peaking allows you to take advantage of many manual lenses to make manual focusing even more effortless. “You’re going to want to use it more with manual focus than with autofocus because, with manuals, you’re going to see the different areas get highlighted as you turn the focus ring. It’s more beneficial to use with manual focus than autofocus, but you can definitely use it with both," Weingart says.
Tips of focus peaking
Before you take your digital camera for a spin, learn the four primary elements of focus peaking to make your next shot superb.
1. Peaking color: In your camera’s settings menu, customize the peaking to match the scene you want to capture. For example, modify the peaking highlights’ color to contrast with your image to make it more visible.
2. Peaking level: Alongside the colors, change the levels of peaking on your next portrait. Generally, there are two to four options to choose from, with higher levels producing more highlights and lower levels being more judicious.
3. Split image: Like range finders and old split focus screens, split image is a Live View focusing aid. With a split image, you rotate the focusing ring on an image until the separate parts of the image line up.
4. Magnify: The only way to tell if your capture is sharp is if you magnify all its details in the Live View mode through the optical viewfinder. Use either focus peaking or split image and do the best you can, then enlarge the image to refine the focus position.
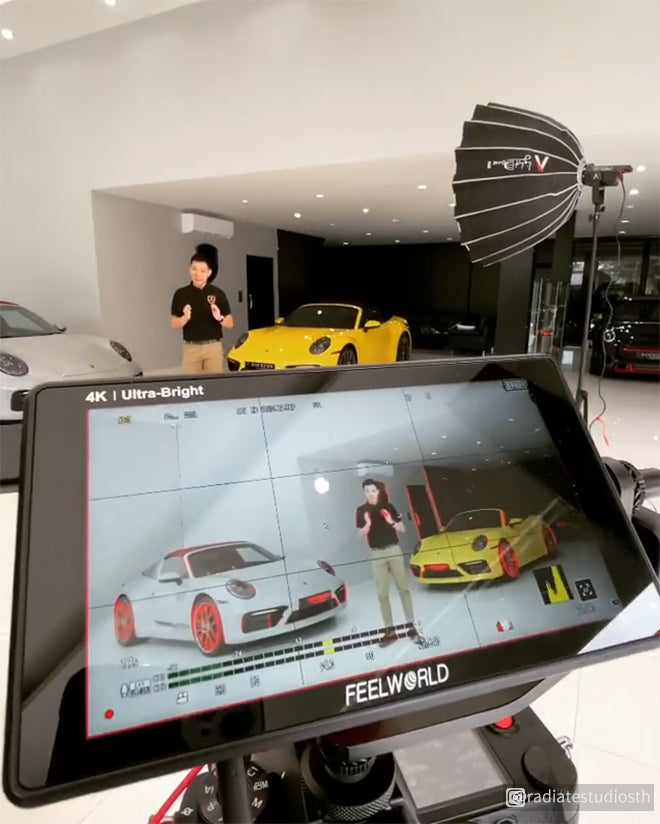
If you are a video maker or director who needs to use the function of Focus Peaking when monitoring the scene, FEELWORLD will be the best choice for you.