Enhancing Your YouTube Studio Setup with Three-Point Lighting: Make Your Videos Stand Out
Jun 08, 2023
During the shooting process, most people will choose to use normal lights to illuminate, but the lack of brightness or colour temperature of ordinary lights will lead to uneven colours in the video, adding great difficulties to post-production.
If you use professional video lights in your YouTube studio helps you elevate the production quality of your videos, create a visually appealing and immersive experience for your viewers.
Professional video lights are specifically designed for video production, providing consistent and high-quality lighting. This ensures that your videos are well-lit, allowing your viewers to see you clearly and enhancing the visual appeal of your content.And well-lit videos require less post-production adjustments, reducing the need for extensive color correction or exposure modifications.
Professional video lights are versatile and can adapt to different shooting scenarios. You can adjust the intensity, color temperature, and direction of the light to tailor the lighting to match the style and tone of your content,
What's more, high-quality lighting can significantly enhance the overall professional look and feel of your videos.
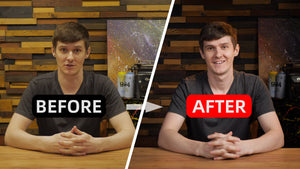
Let's compare the difference before and after setting the lighting
Normal Light:

Professional Video Light:
When you light a scene it is not enough to just bring enough light so the character will be seen. You also need to give the photographed object a three-dimensional look.
This illusion will be created with the shadows and highlights in the shot. The great advantage of this technique is that you can do it even without any expensive lighting equipment.
The three point lighting technique is a classic Hollywood lighting technique. If you want to learn how to set up light in a scene,In this article,Alternative Vyacheslav will shows how he built up the three-point lighting to setup YouTube studio with FEELWORLD.
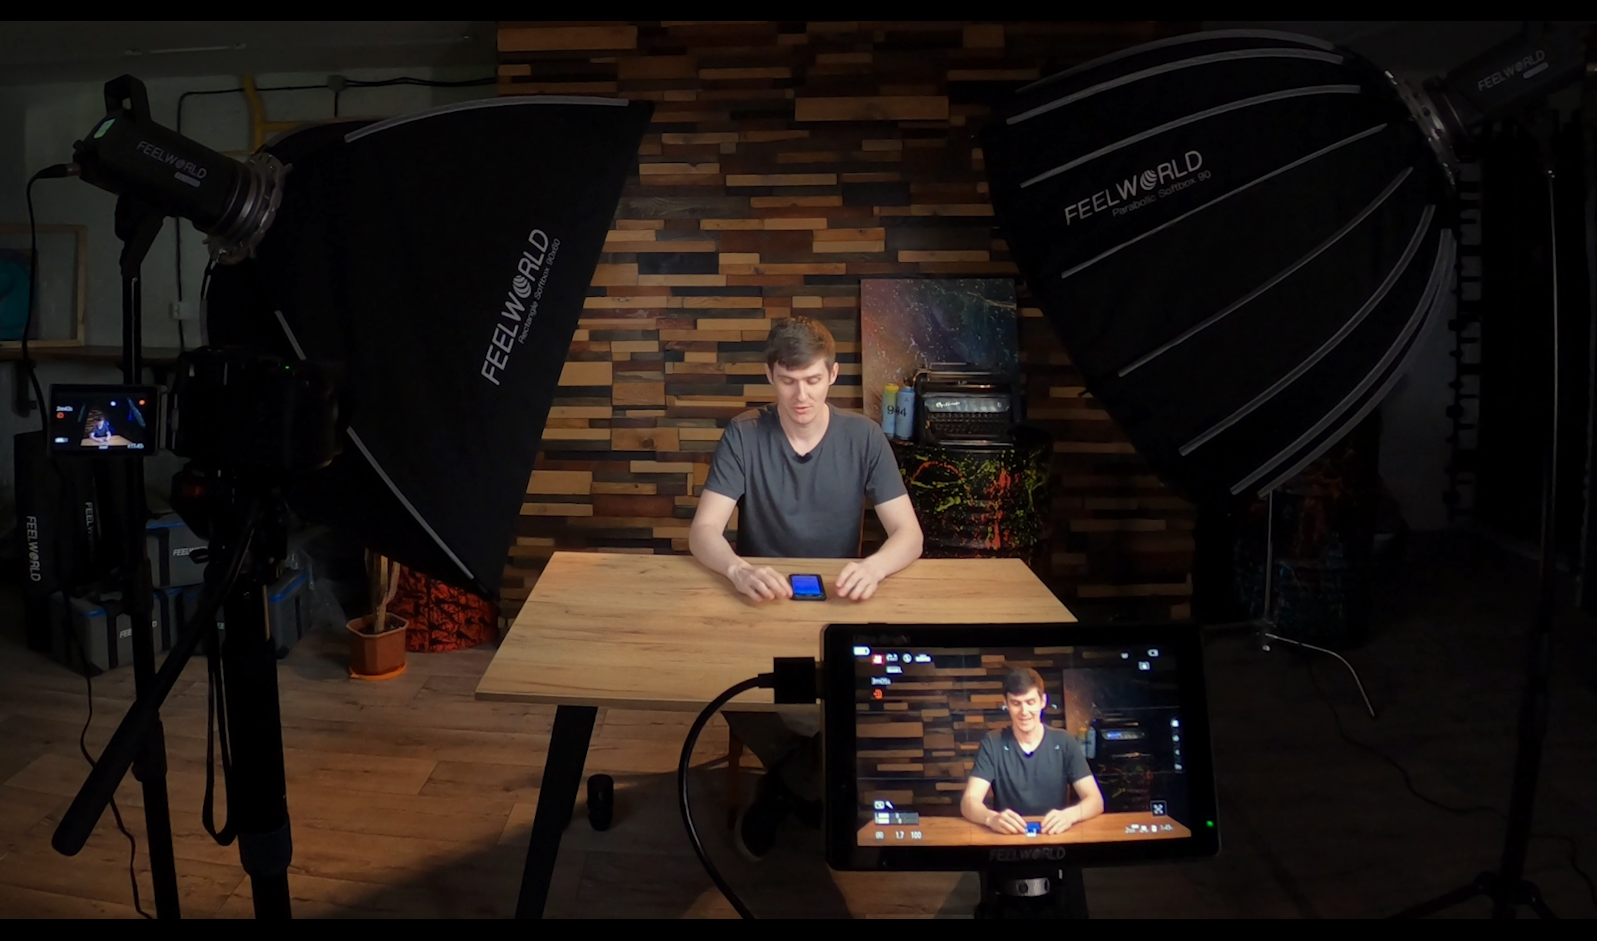
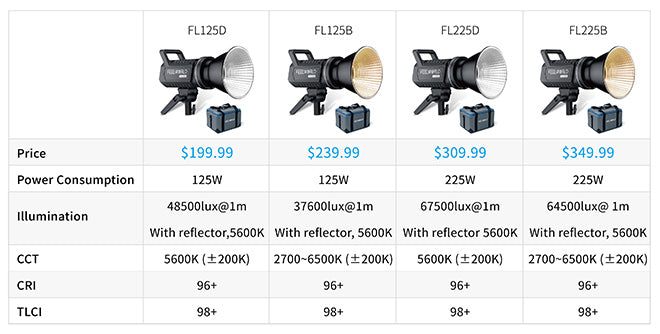
Equipment List:
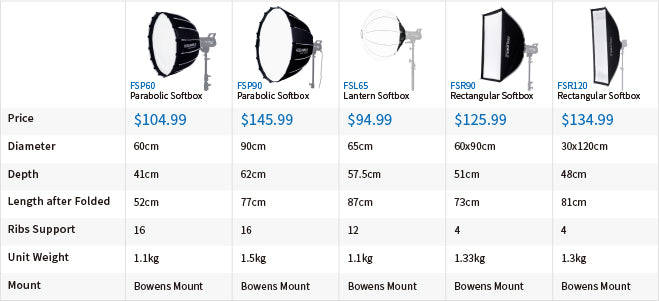
1.Key light was an FEELWORLD FL225B 225W bi-color in a FSP90 90CM deep parabolic softbox
2.Fill light was an FEELWORLD FL125D 125W daylight in a FSR90 60X90CM portablr rectangular softbox
3.Back light was an FEELWORLD FL125B 125W bi-color
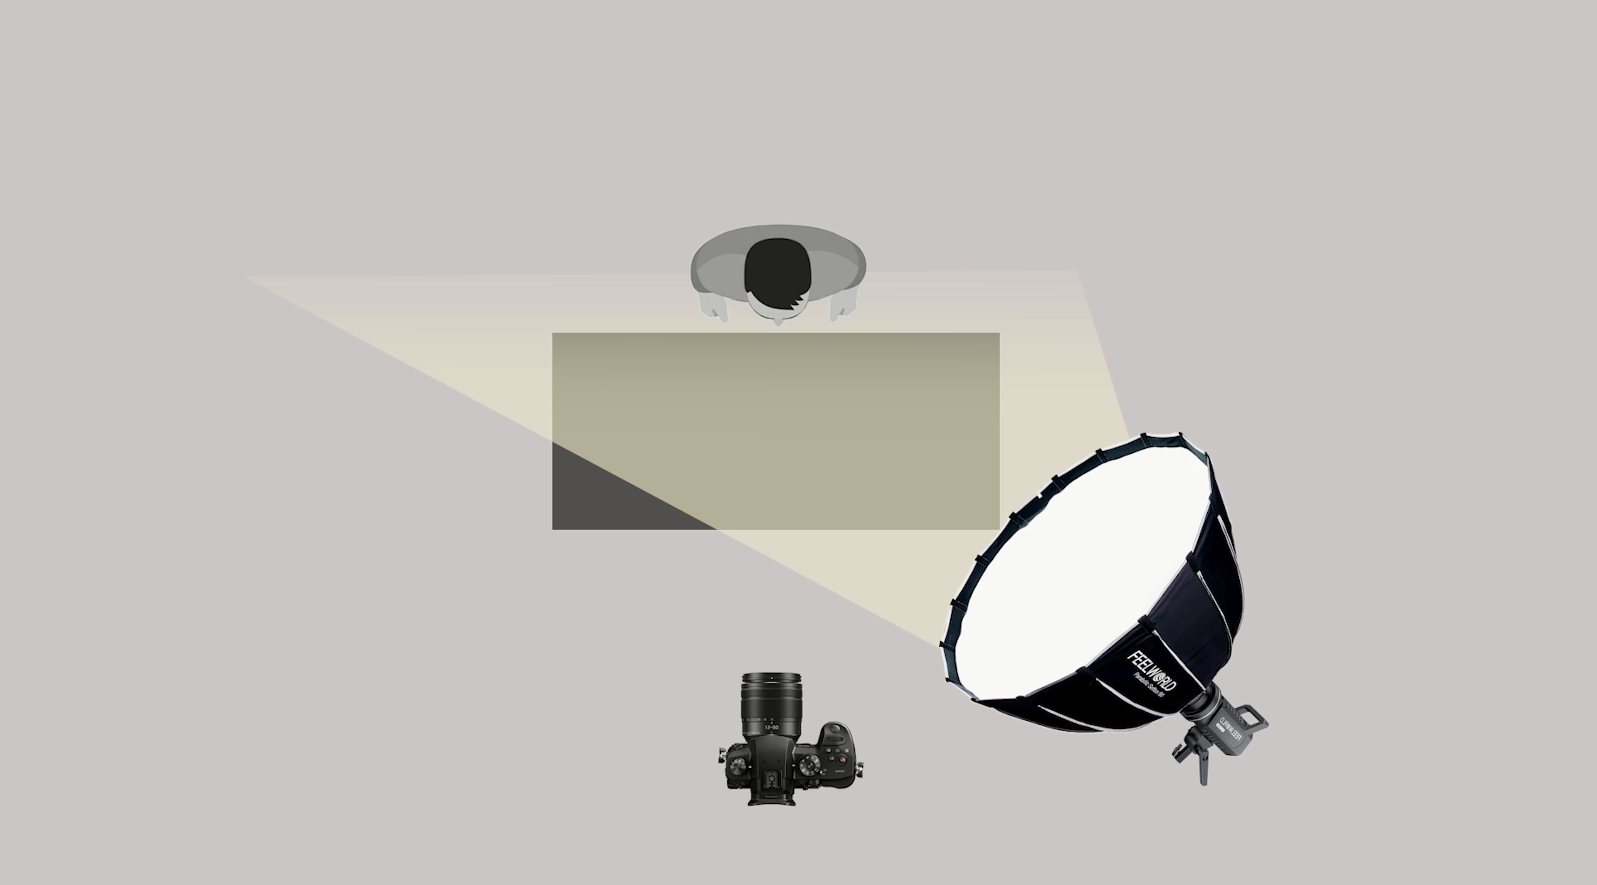
Setup 1:KEY LIGHT
“I used a FL225B with FSP90 softbox as a key light”
The key light as the main light for the whole YouTube studio, installing the key light at 45 degrees,It will be doing most of the heavy lifting when lighting subject. As the camera will be directly in front of subject, this light will be positioned to right the camera.
“I also added a grid to the front of the soft box.”
This helps soften the light even more, and also helps direct the light toward the product without spilling light all around.
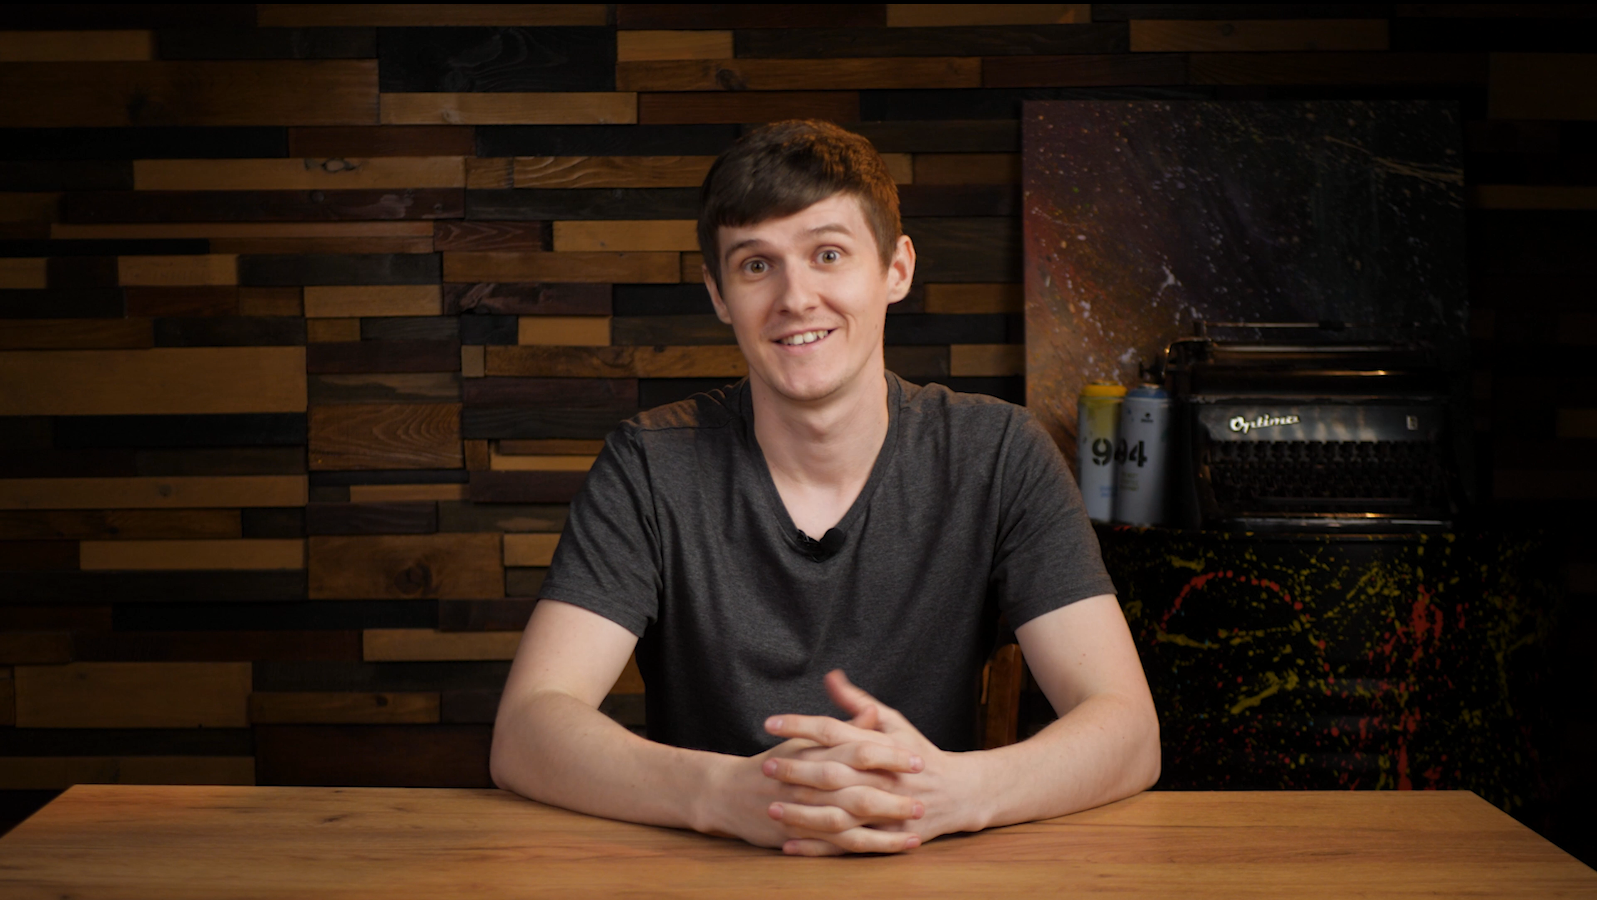
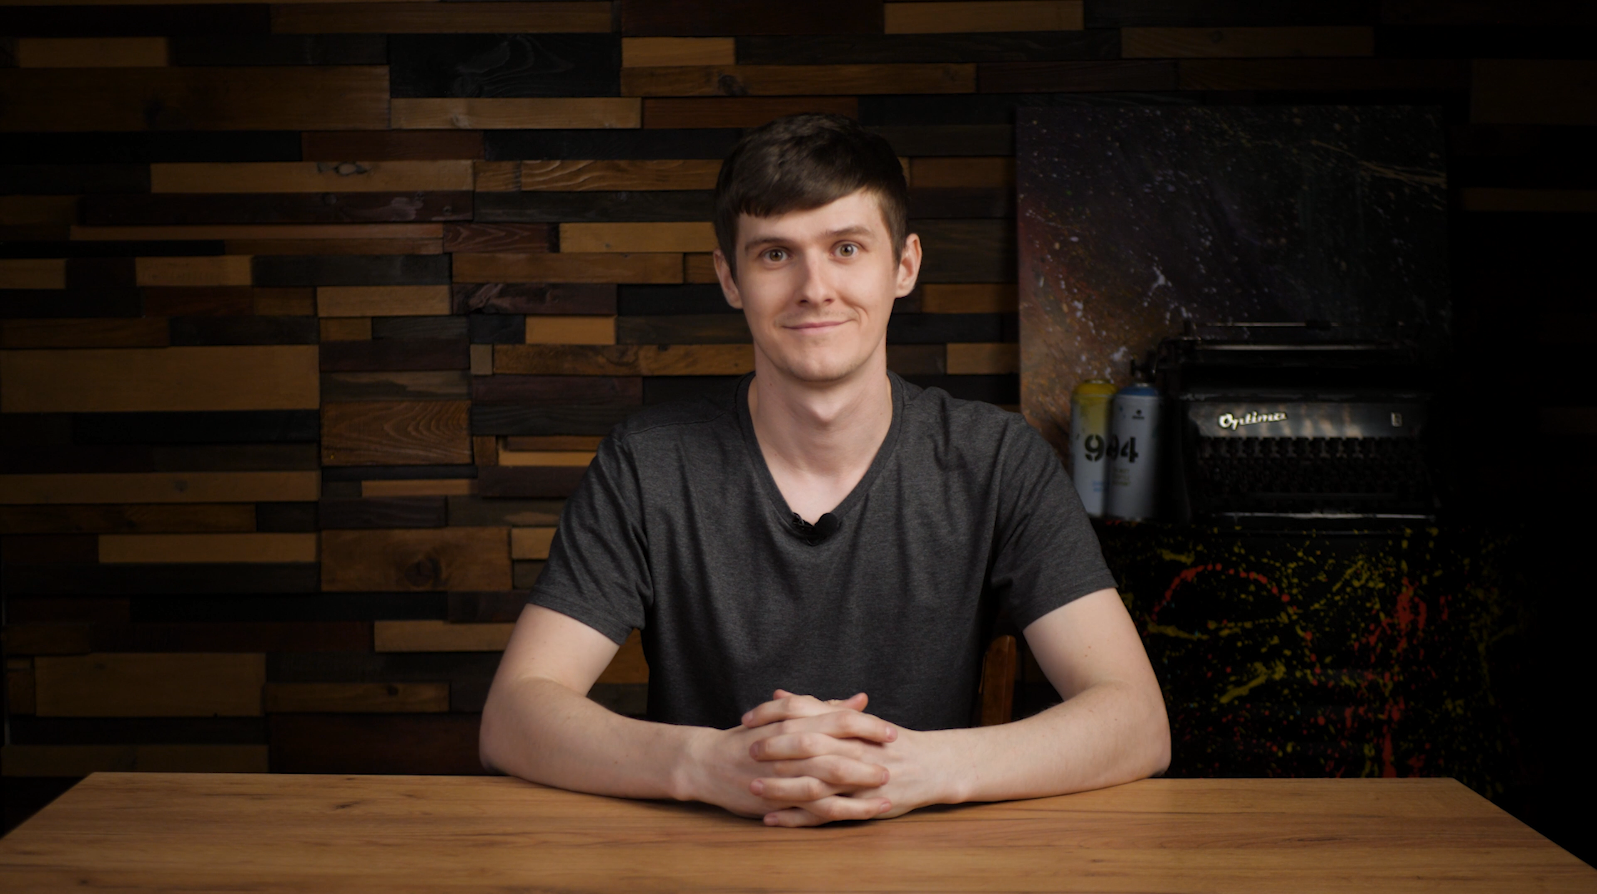
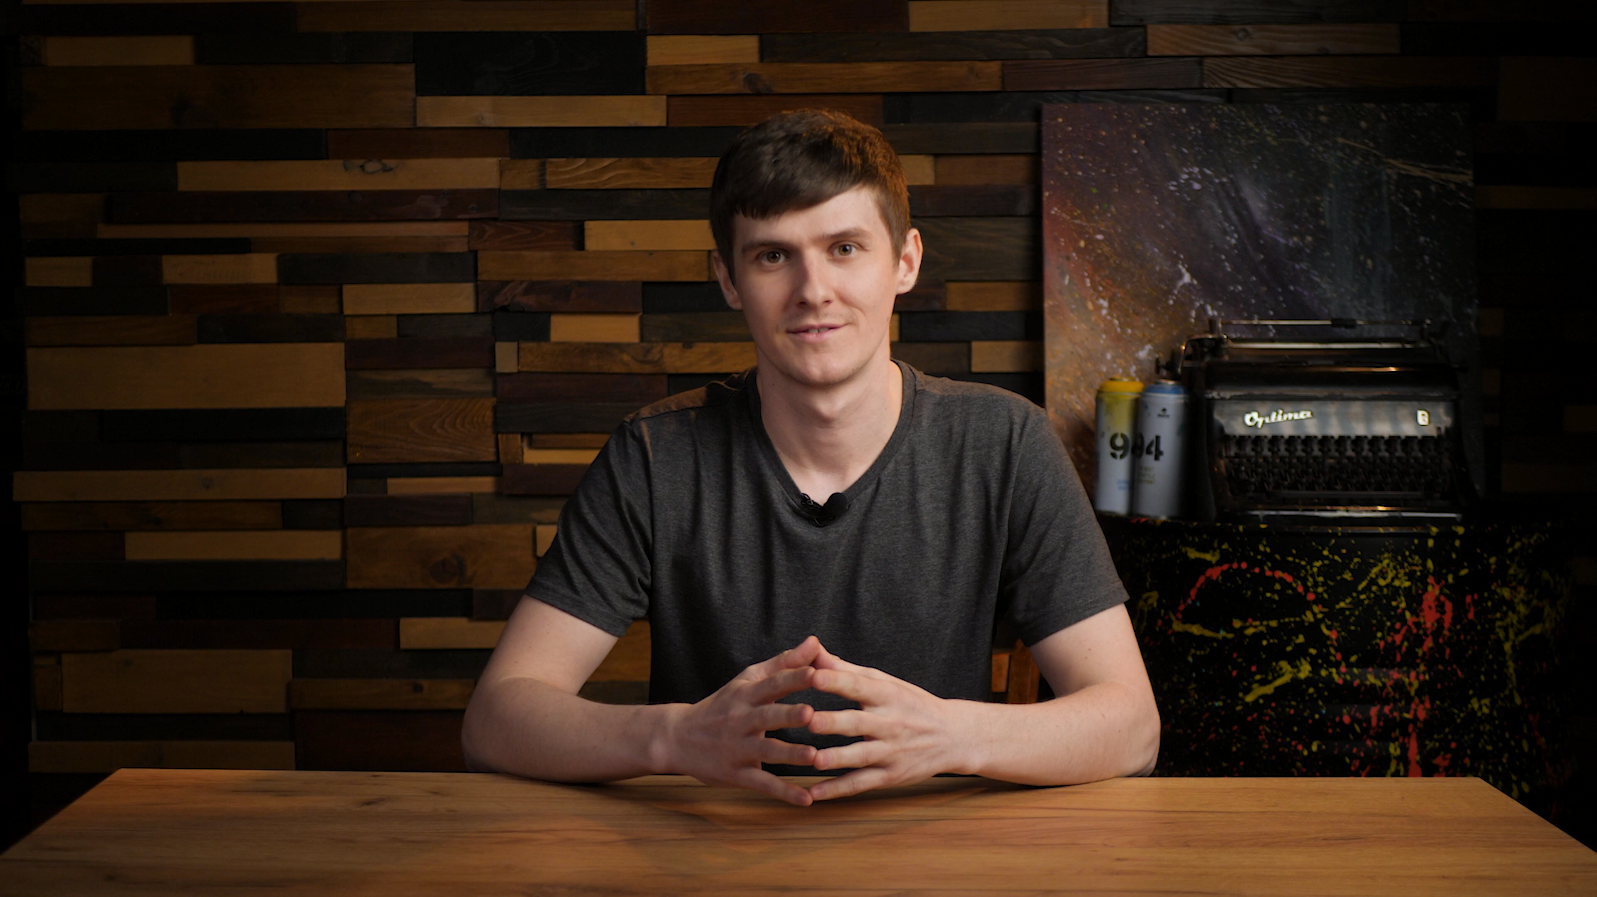
Check out the key light in this image. You can see it softly hitting Alternative's face.
The background is dark, but we still have plenty of light on him, seeing the clear outline of his face.

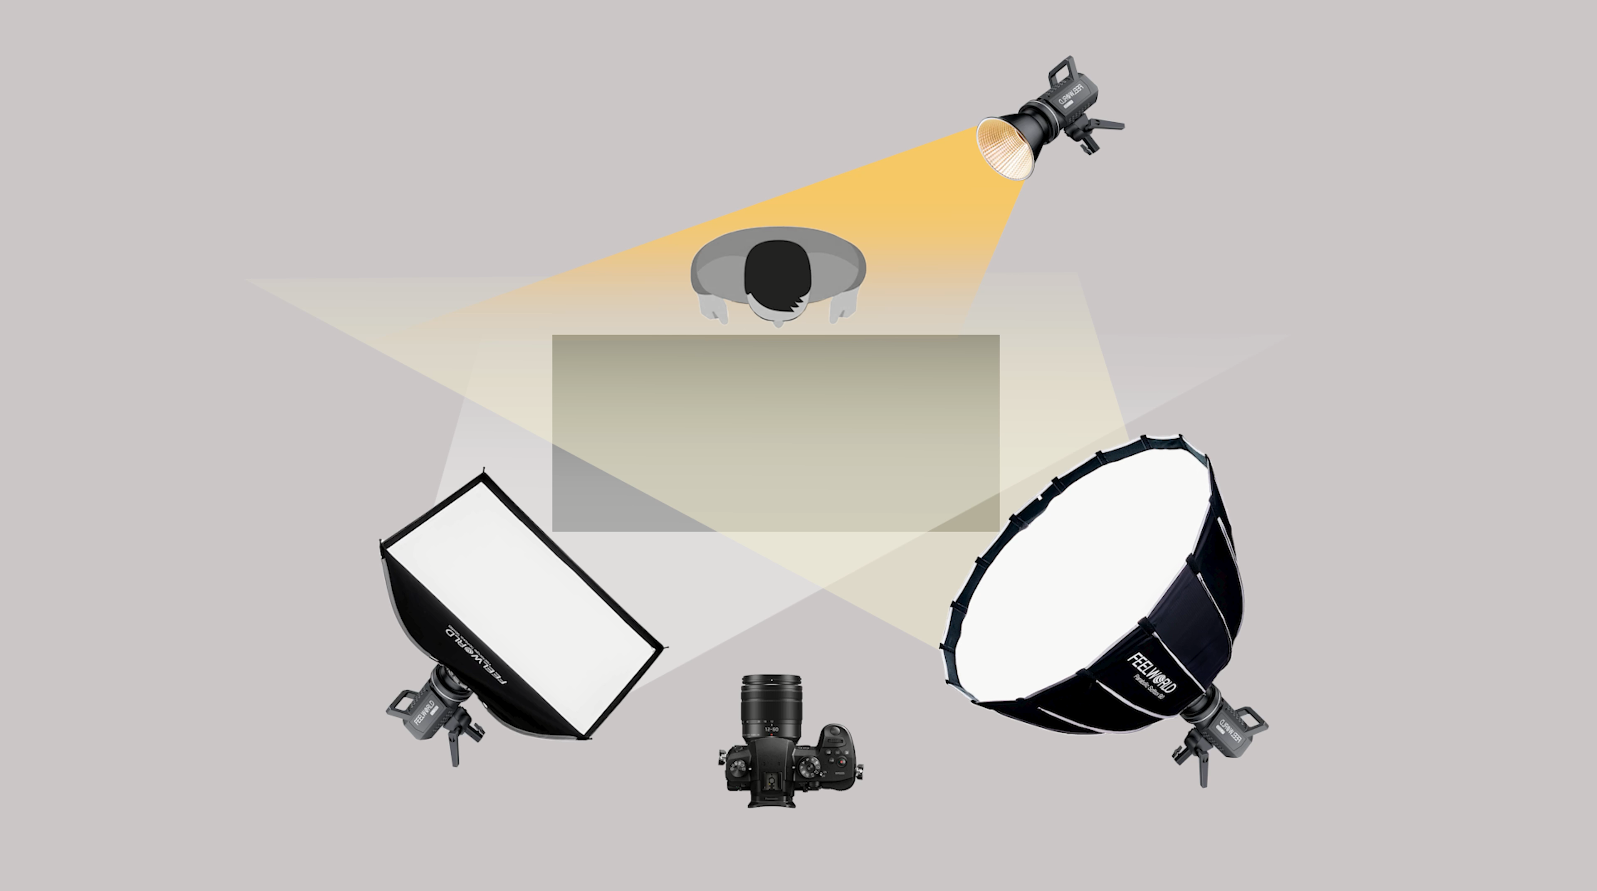
Setup 2:FILL LIGHT
The fill light is secondary light source. On the opposite side of the key light while setting up a three-point lighting system. Its job is to "fill in" any shadows that the key light may create.
This light should be dimmer than the key light,so choose a FL125D 125W daylight with FSR90 softbox as fill and positioned at an angle where it produces some depth while bringing out detail on the subject's other side.

Setup 3:BACK LIGHT
“From here, I added a backlight and placed FEELWORLD FL125B 125W Bi-color up high, and angled it down a little.“
This light helps illuminate the back edge of the subject as well as the texture of its side.
It also helps separate it from the backdrop. Backlighting a product is especially helpful if you need some extra reflection detail on the ground around the product.
That's all there is to set up a 3-point lighting for YouTube studio! When done right, can help light your studio and improve your overall video quality than traditional lighting.
So, follow the simple steps mentioned above and take your video quality to the next level.
If you want to know more about the FEELWORLD video light, you can click on the link below to see the details.